How to run the Osmosis GenoM experiment
If it is not already running, it is a good idea to start roscore in its own terminal beforehand
roscore &
Then, the experiment should be started in a large window (which will be split in 8 sub panes) as shown on the screen dump bellow.
cd ~/work/osmosis/scripts
./start-simu.sh -r robotnik -e airport
The following windows should show on your screen. The left top window is the Gazebo simulator. The left bottom window, is the rviz visualisator, while the right large window is your original window split in 8 panes.
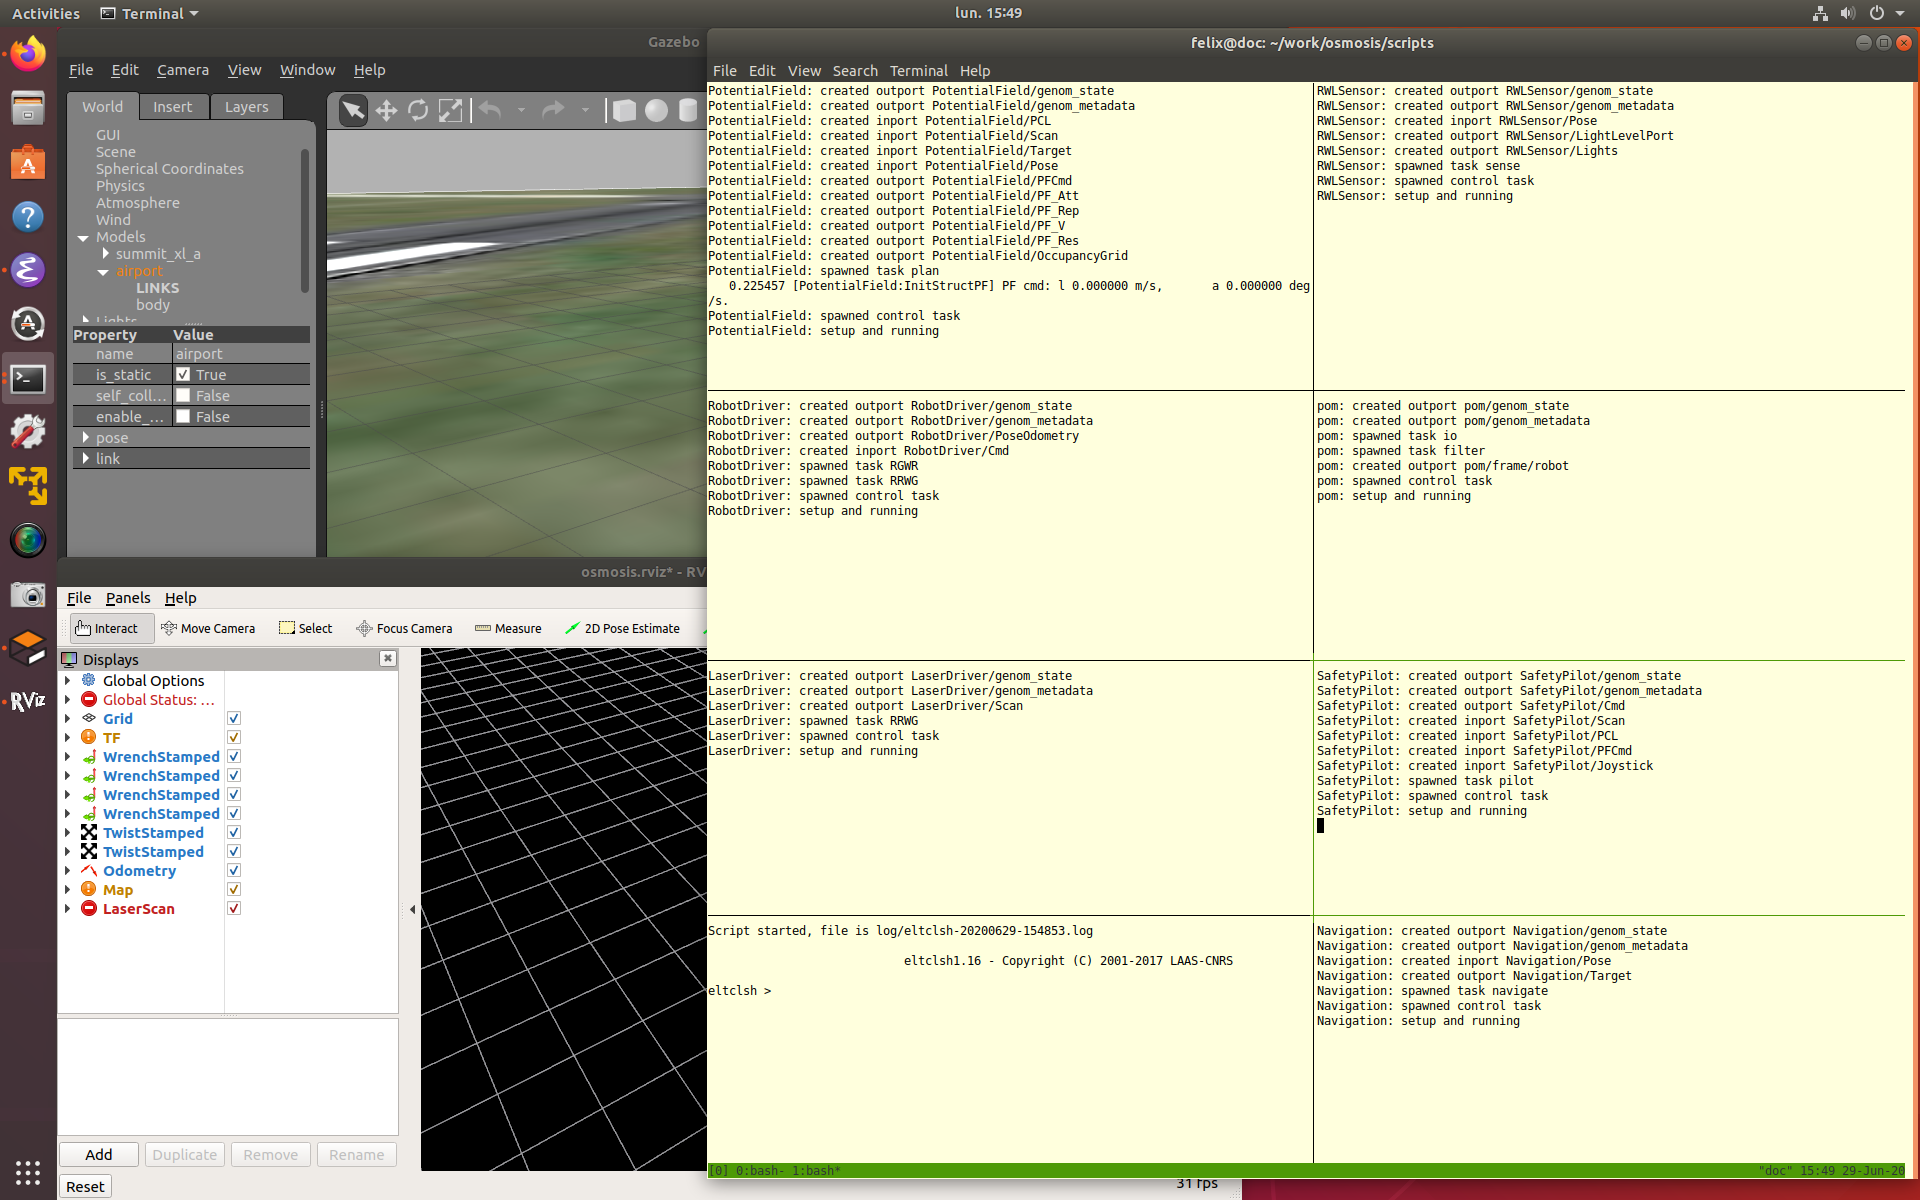
This main window is a tmux window, displaying the trace of 7 GenoM modules (PotentialField, RWLSensor, RobotDriver, pom, LaserDriver, SafetyPilot and Navigation) plus an eltclsh pane (lower left) which is a tcl shell used to interact with the modules (this shell has completion and history for your convenience).
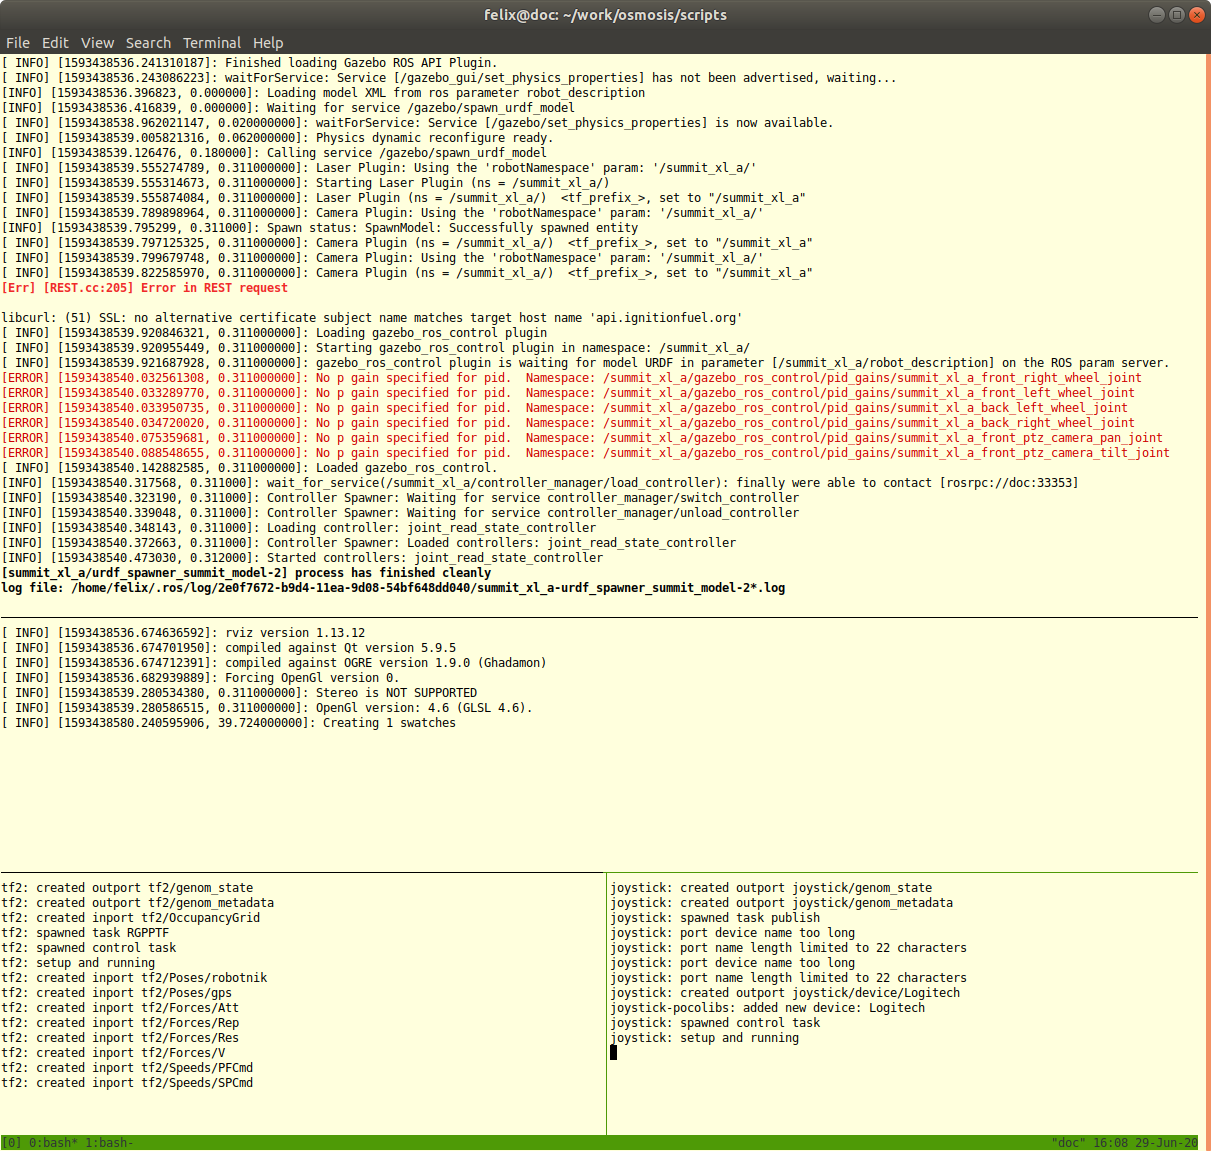
There is actually another tmux "window" behind this one you can access with ^b n (hit Control-b then the letter n) which shows:
-
the Gazebo traces,
-
the Rviz traces
-
and the tf2 and joystick modules traces.

|
Type ^b n (Control-b n) again to come back to the original tmux window.
|
Select the eltclsh pane, and type:
eltclsh > source start-simu.tcl
eltclsh > init
The start-simu.tcl is a tcl script file containing all the commands needed to initialize the robot.
Providing you change the point of view in Gazebo and Rviz, you should see something like (we have added a couple of cylindrical obstables) :
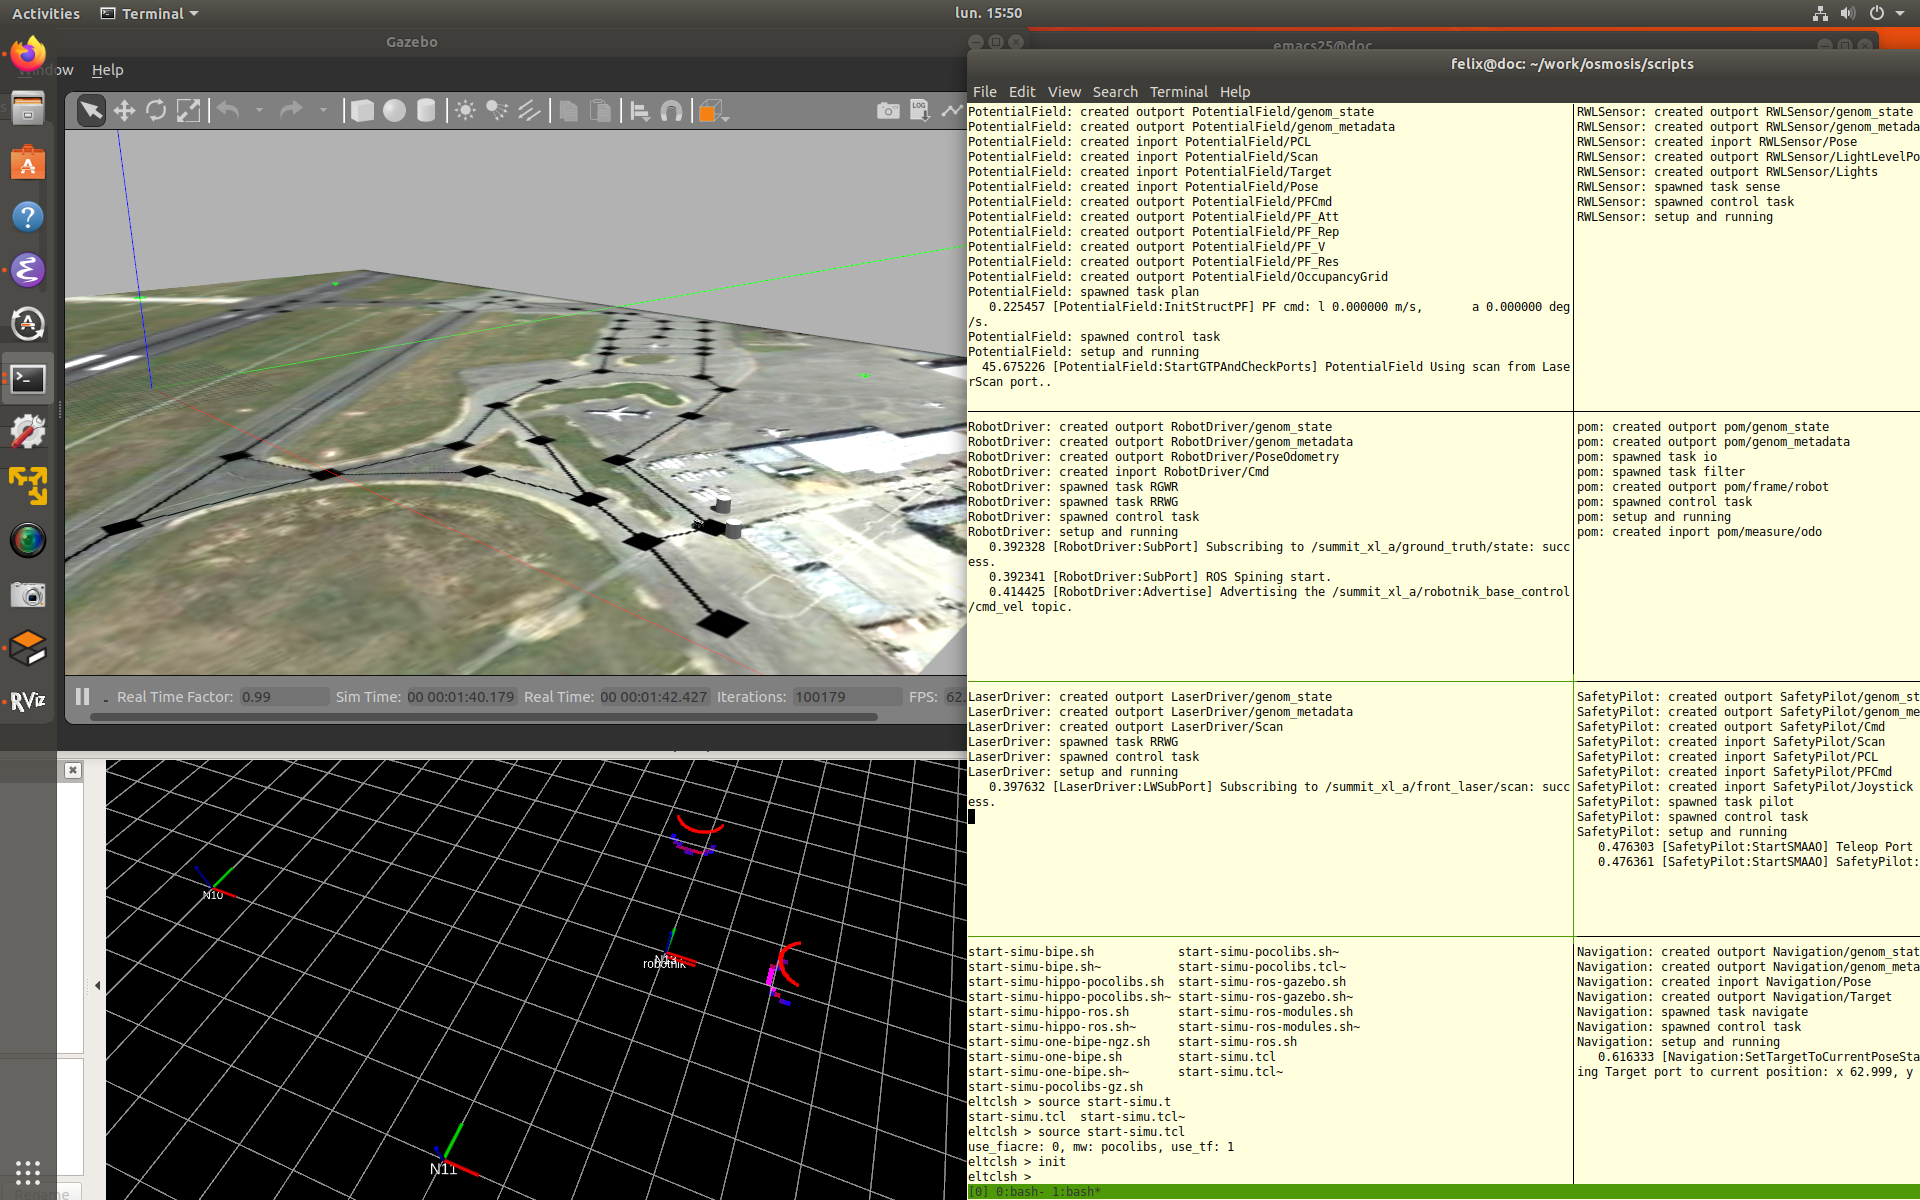
The various frames Nxx are navigation points which corresponds to the dark squares in the Gazebo window. The red dots
are LaserScan has perceived by the robot, while the small blue/purple/red squares on the ground are cells of the Occupancy Grid
computed from the laser scans.
If you type in the eltclsh pane
eltclsh > Navigation::GotoNode N2 &
The robot should start moving in the Gazebo simulation and in rviz. You can add obstacles and see how the robot react. If you have a joystick connected to your computer, and it was seen by the joystick module, you can also control the robot (button: X-slow, A-middle, B-Fast) + left stick.
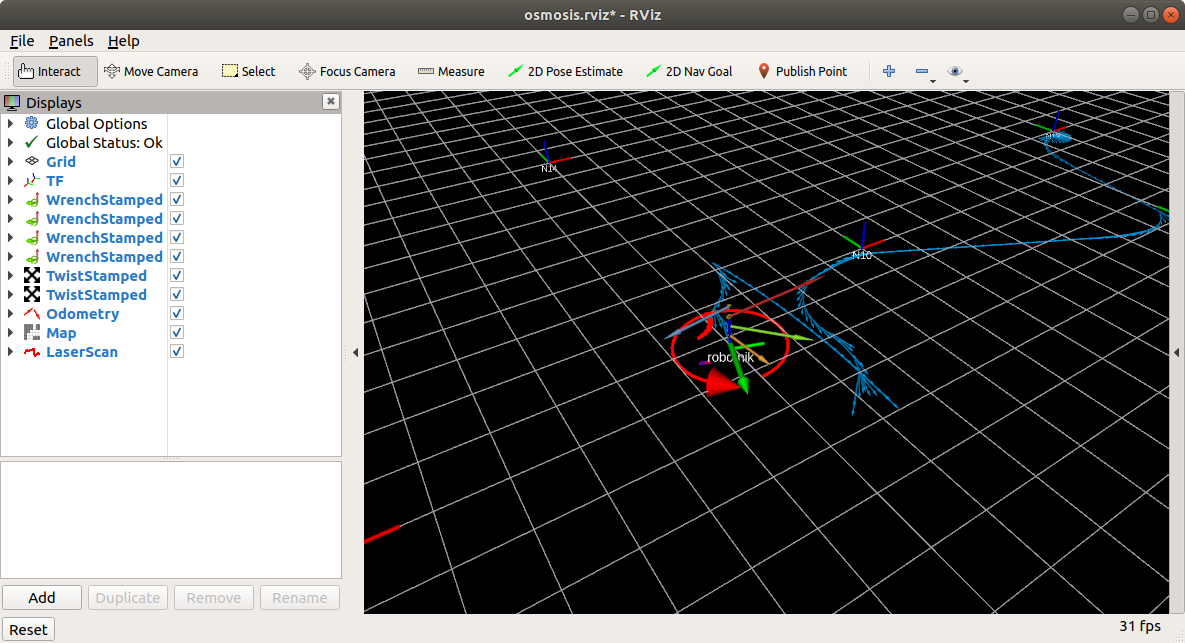
While navigating the following can appear around the robot (see screen below):
-
blue arrows on the ground is the trace of the position of the robot as computed by pom
-
blue arrow above the robot is the attraction force of PotentialField (only displayed when the robot has a current goal).
-
red arrow the repulsive force (only displayed when there are obstacles in the vicinity).
-
the orange arrow the V force (see the paper)
-
green arrow, the resulting force (the addition of the 3 above)
-
from the bottom, the first the green
vxand red circlewzare the PotentialFieldvx,wz -
the one above is the one produced by SafetyPilot (i.e. executed bu the robot) (not visible here). If you take control with the joystick, you will set the speed produced by SafetyPilot.