Running CAMS in simulation mode (Tutorial)
This tutorial will teach you how to run the CAMS GUI with a simple scenario in simulation mode.
- Table of contents
- Running CAMS in simulation mode (Tutorial)
First of all, make sure you have successfully completed the Installation tutorial. Then, open a terminal and change the current directory to the folder where the core packages are installed.
cd /path/to/nephelae_workspace
Obtaining the simulated cloud environment files
In order to run CAMS in fully simulated mode first yout need a mesoNH file describing a synthetic atmospheric environment. MesoNH files are databases in NetCDF (.nc) format.
Reduced cloud environment
A sample of a full cloud simulation can be found here: cloud_example.nc (which is a crop of an small area of the file below)
Complete cloud environment
The computer girofle at LAAS contains a mesoNH file that can be used with CAMS. You can use the command below to mount the folder the remote folder as a local directory:
sshfs girofle.laas.fr:/media/Nephelae-Data/data/Nephelae/ mesonh_girofle_mount/
The recommended file for this tutorial is:
REFHR.1.ARMCu.4D.nc
Despite its huge size (~72 GB), the best way to work with this particular file is to download it to your computer. If you are at LAAS connected with an Ethernet cable, you have a high-bandwidth and low-latency link. Therefore you can read the files in the remote folder directly, but beware of errors that can occur if the quality of the connection degrades.
Scenario setup
A valid configuration file is required to run the graphical interface server. Scenario configuration files describe the atmospheric environment and the UAVs so CAMS can use the appropriate algorithms and models to manage them. For this tutorial a simple configuration file is provided describing a scenario built upon a simulated atmosphere with cumulus clouds and two UAVs.
1. Download the configuration file for this tutorial: https://redmine.laas.fr/projects/nephelae-devel/repository/nephelae_base/revisions/master/raw/examples/config/tutorial_simulation_mesonh_2uav.yaml
2. You need adapt the following configuration values to match with the path of your CAMS workspace. Replace /PATH/TO/ with the actual path.
database: filepath: '/PATH/TO/database01.neph'  # CAMS database file. It stores the atmospheric and UAV information generated during the run
mesonh_files:  &mesonh_files '/PATH/TO/REFHR.1.ARMCu.4D.nc' # MesoNH simulation file.
aircrafts: 200: plugins: Missions: backup_file: '/PATH/TO/backup_200.bin' #
aircrafts: 201: plugins: Missions: backup_file: '/PATH/TO/backup_201.bin' #
There are many other options that can be set in this configuration file to adapt CAMS to your needs. For more information, there is a scenario configuration reference guide in the wiki but for now you should stay with the default setup.
TODO: Introduce & explain the main parameter groups in the configuration file to give an overview of the situation the user will be managing.
Launch the UAV simulation with paparazzi
Configure the UAVs
Open a new terminal, change the current directory to the paparazzi installation folder and open the Paparazzi center :
cd /PATH/TO/paparazzi
./paparazzi
1. Select the aircraft Lisa_Neph_0 from the A/C list
2. Click build
3. Repeat the same procedure with the Lisa_Neph_1 aircraft
You only need to do this operation once, unless you modify the UAVs or change computers!
Start the simulation
Open two new terminal windows and run respectively to start the simulation of both UAVs:
cd nephelae_paparazzi/tests/sim_launchers && python3 sim_launcher.py Lisa_Neph_0 Lisa_Neph_1
Three new windows will appear
 |
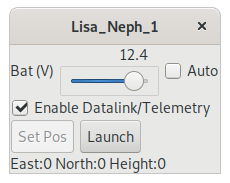 |
Wait a couple of seconds for the simulation to warm up and then click on the launch button  followed by the takeoff button
  on Lisa_Neph_0 and Lisa_Neph_1
Run the CAMS GUI
Go to the installation folder of nephelae_gui and in a terminal, run:
export NEPHELAE_CONFIG="/PATH/TO/tutorial_simulation_mesonh_2uav.yaml"
make runserver
Replacing /PATH/TO/ with the actual path.
Create a mission for a UAV
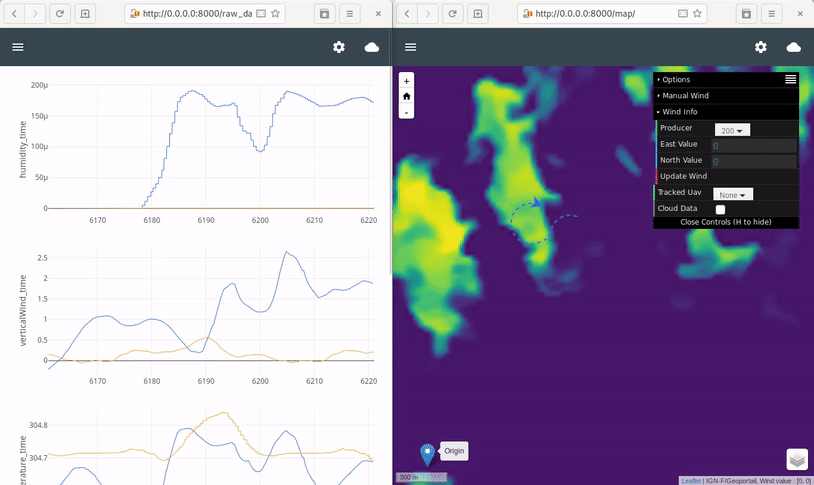
Open the CAMS GUI on the Mapping tab. Go http://0.0.0.0:8000/map/
Click somewhere over the map —preferably over the center of a cloud indicated by green shades— and select New mission. The create mission window for the aircraft 200 (Lisa_Neph_0) will appear. Click on Create .
Go to the Mission Validation tab and Authorize the request to send the new mission to the paparazzi GCS.
Switch to the paparazzi GCS window and click on the Mission button  corresponding to the Lisa_Neph_0 UAV. This will tell the drone to start the mission.
Now you can follow the adaptive cloud mapping mission in the Mapping tab of the CAMS GUI and monitor live raw data in the Sensor data tab
| |
|
For more information about the possibilities of CAMS you can continue exploring the Graphical User Interface Reference guide.
Set an arbitrary horizontal wind for the UAVs
In the paparazzi center open the Tools menu → Environment Simulator to start the Gaia window. You can select there the desired wind and the simulation speed.
Warning: Changing the time scale setting can produce unintended consequences with the accuracy of the flight simulation. CAMS is tied to the wallclock so it will not be aware of this setting!
See also
Updated by Rafael Bailon-Ruiz almost 4 years ago · 29 revisions