Actions
Xilink Vivado » History » Revision 23
« Previous |
Revision 23/97
(diff)
| Next »
Frédéric Blanc, 2023-04-26 14:46
Xilink Vivado
installation Windows
Vivado 2022.2
Windows 64-bit: Run the settings64.bat from the Vivado/<version> directory
On Windows, click Start > All Programs > Xilinx Design Tools > Vivado 2022.2 > Vivado 2022.2 Tcl Shell to launch the Vivado Design Suite Tcl shell.
dir D:\Public\RedPitaya-FPGA
vivado -source red_pitaya_vivado_project_Z10.tcl -tclargs v0.94
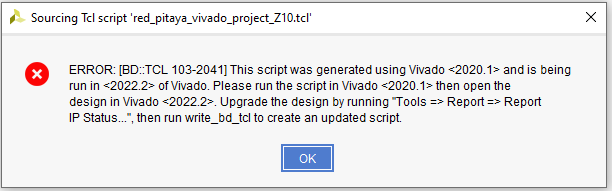
We recommend Vivado 2020.1
Vivado 2020.1
Création d'un nouveau projet
clic doit 
Tcl Console
cd d:/Public/RedPitaya-FPGA/prj/Examples/Led_blink
source D:/Public/RedPitaya-FPGA/prj/Examples/Led_blink/make_project.tcl

pour éviter cette erreur copier le dossier core dans ../tmp/
Bitstream
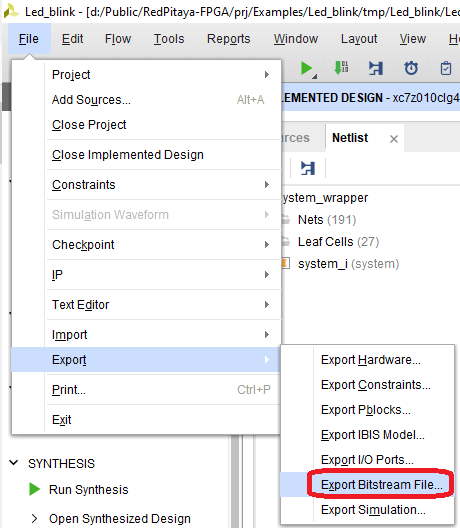
le fichier bitstream doit être remplacer le fichier /dev/xdevcfg
tuto Web
https://github.com/lvillasen/RedPitaya-Hello-World
https://redpitaya.readthedocs.io/en/latest/developerGuide/software/build/fpga/fpga.html
Updated by Frédéric Blanc almost 2 years ago · 97 revisions